

24/7 Phone Support
(231) 591-4822
Toll Free: (877) 779-4822
Walk-up Support
8 a.m. - 4:30 p.m.
UCB 108
IT Core Service Support
8 a.m. - 5 p.m.


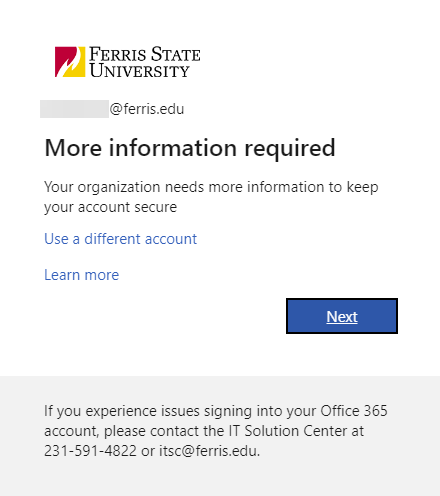
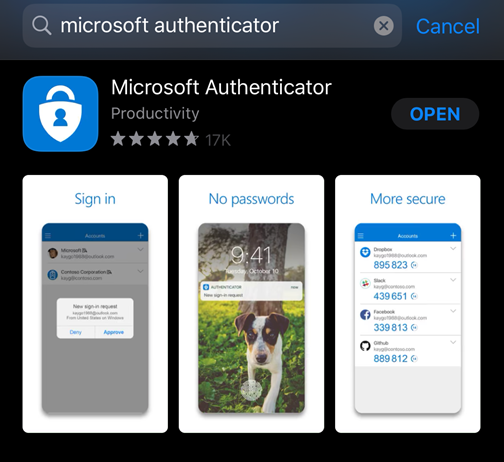
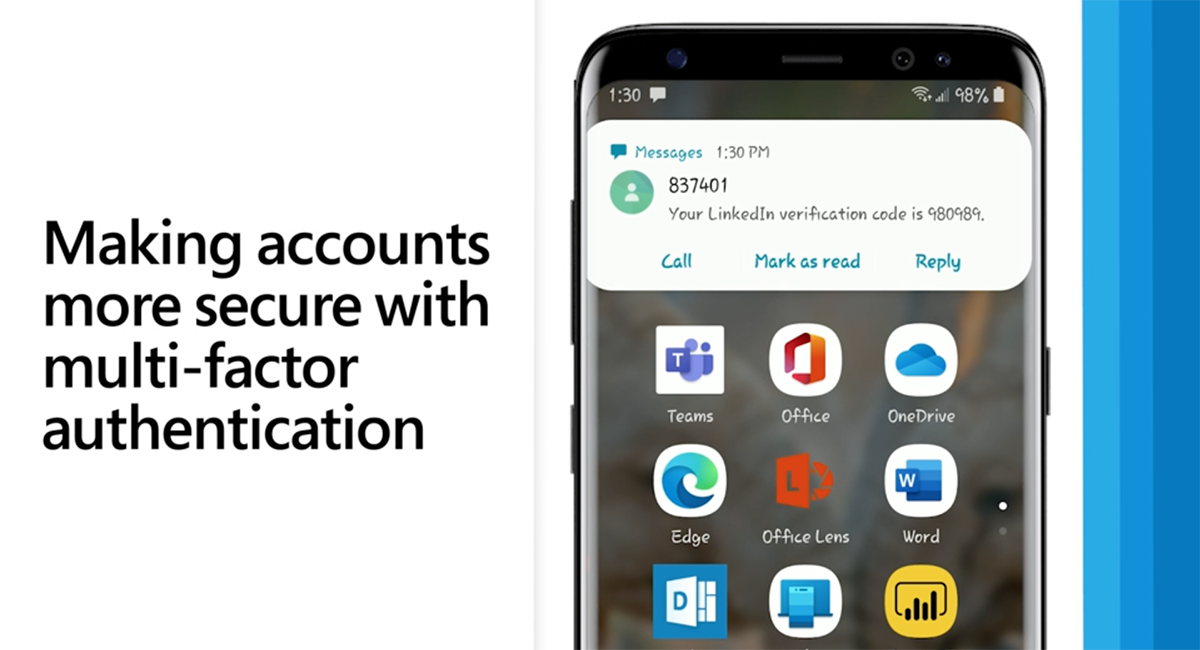
Multi Factor Authentication (MFA) is a security feature that requires more than one method of authentication to verify a user’s identity. MFA is important to setup since it will stop any hackers from logging into you accounts even if they obtain or guess your passwords.
Video: How to Set Up MFA


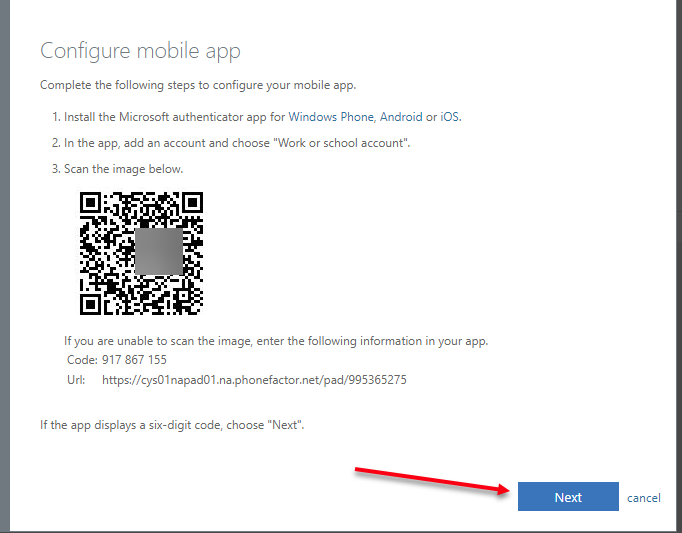

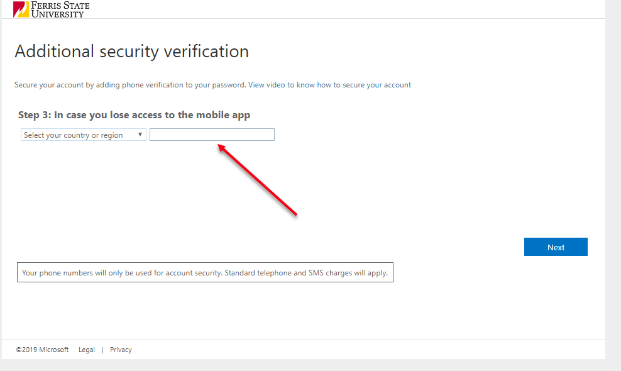

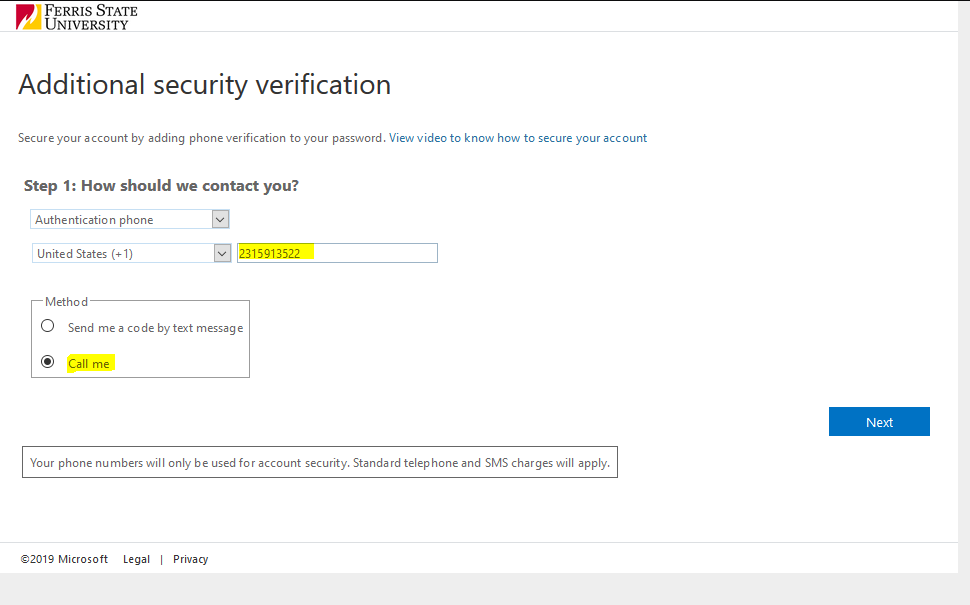
NOTE: This option will not be available starting 9/15/23. Please use the Authenticator app method.

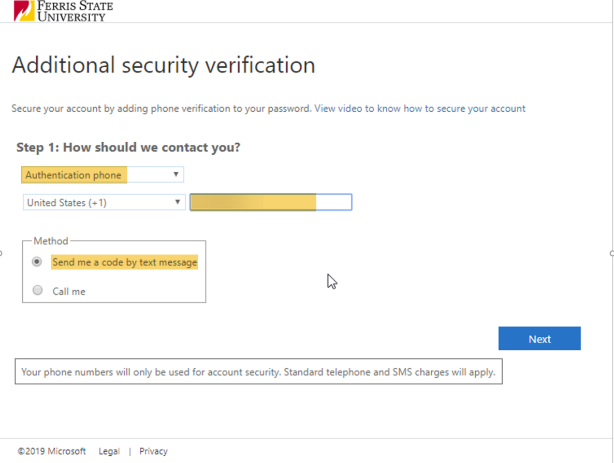

NOTE: This option will not be available starting 9/15/23. Please use the Authenticator app method.


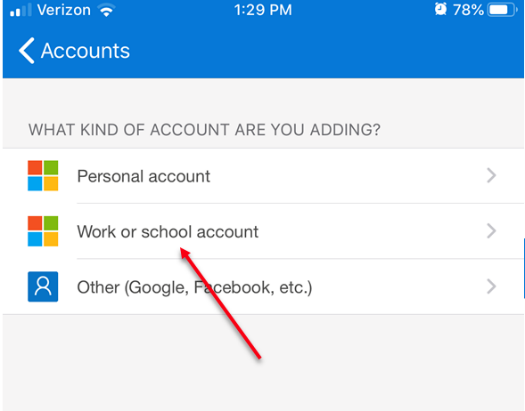
Adding additional MFA methods is always a safer way to access your account in case one method is not responsive. ITS will only reset MFA methods and will not manually add in additional methods for a user. If a user wishes to have multiple MFA methods see below on how to add additional MFA methods to your account.
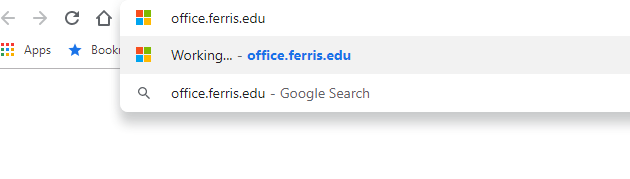
1. Navigate to office.ferris.edu in your browser and type your email address into the box. Hit Next and then enter your account password. Hit the “sign in” button.


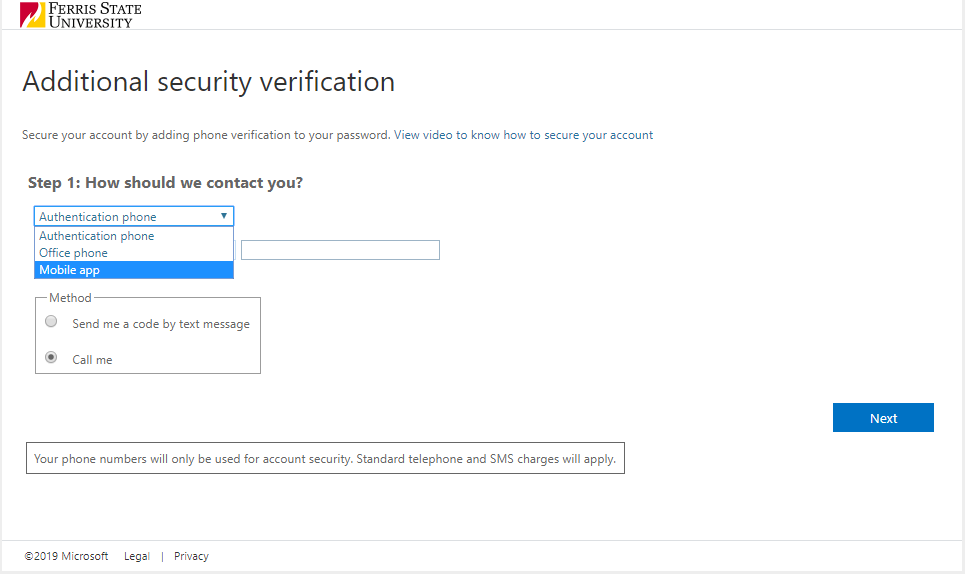
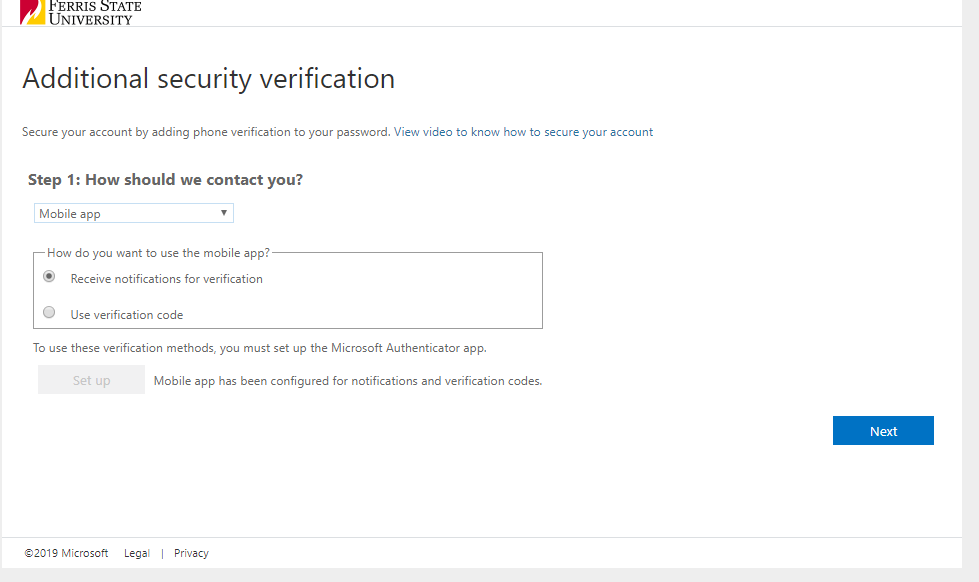
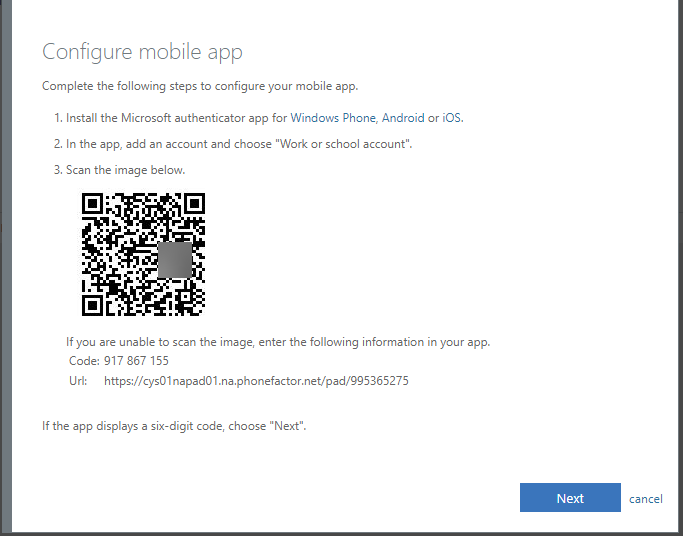
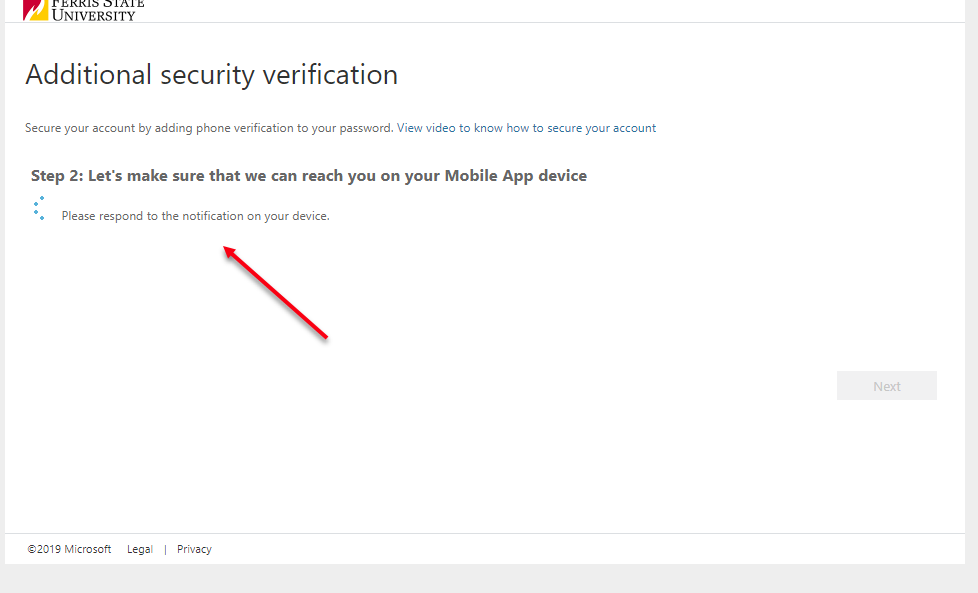
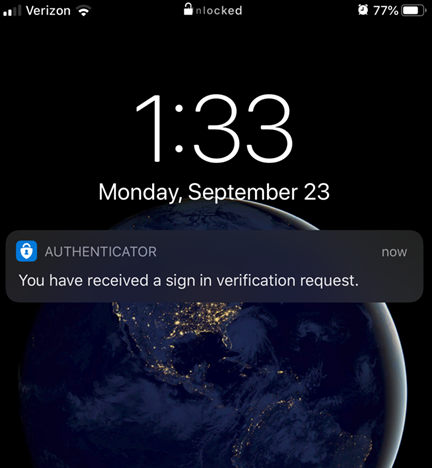
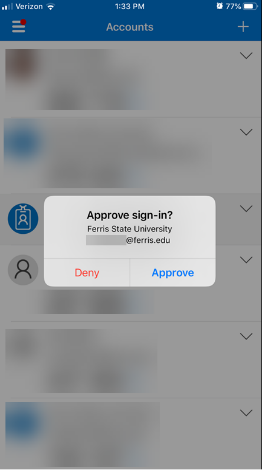
2. Complete your MFA approval step. [ NOTE: This step may vary based on your default MFA option.]

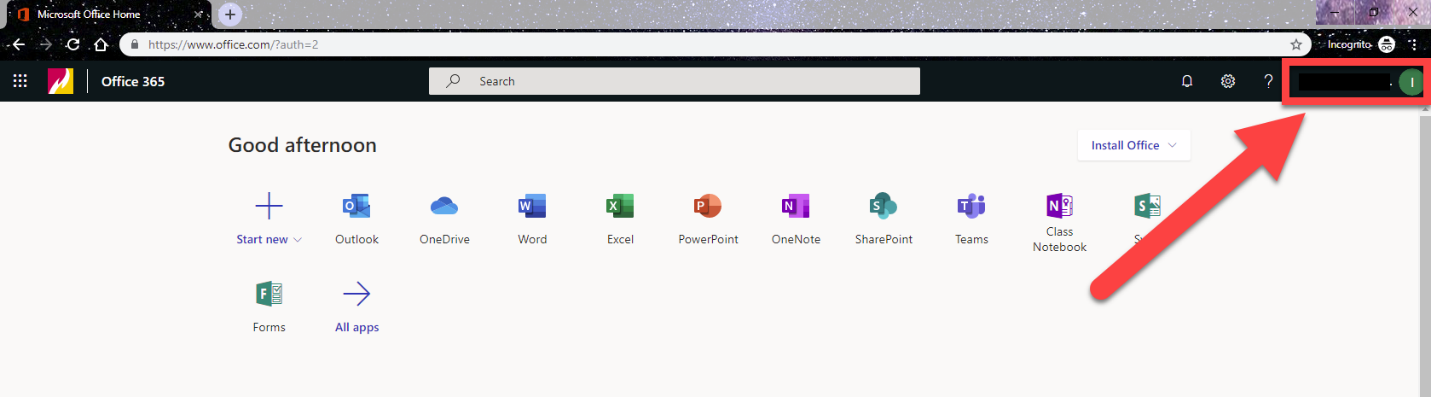
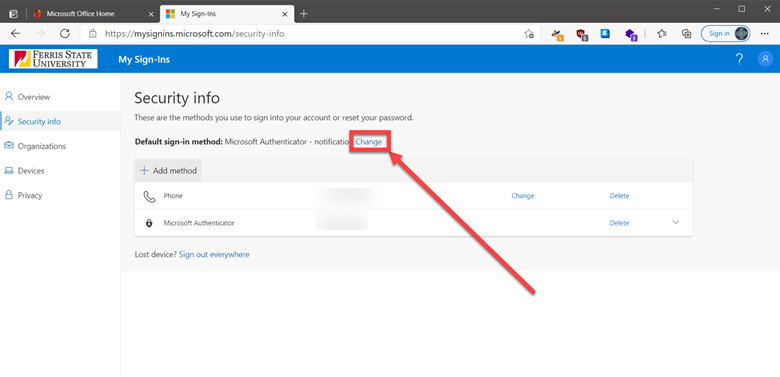
3. Once logged into your account you will see a screen like the image below; click
your account name on the top right of your screen.

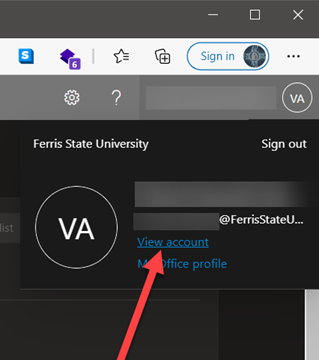
4. Once you have clicked on your account name you will see two different options
“View account”, and “My Office Profile” Click on the “View Account” tab.

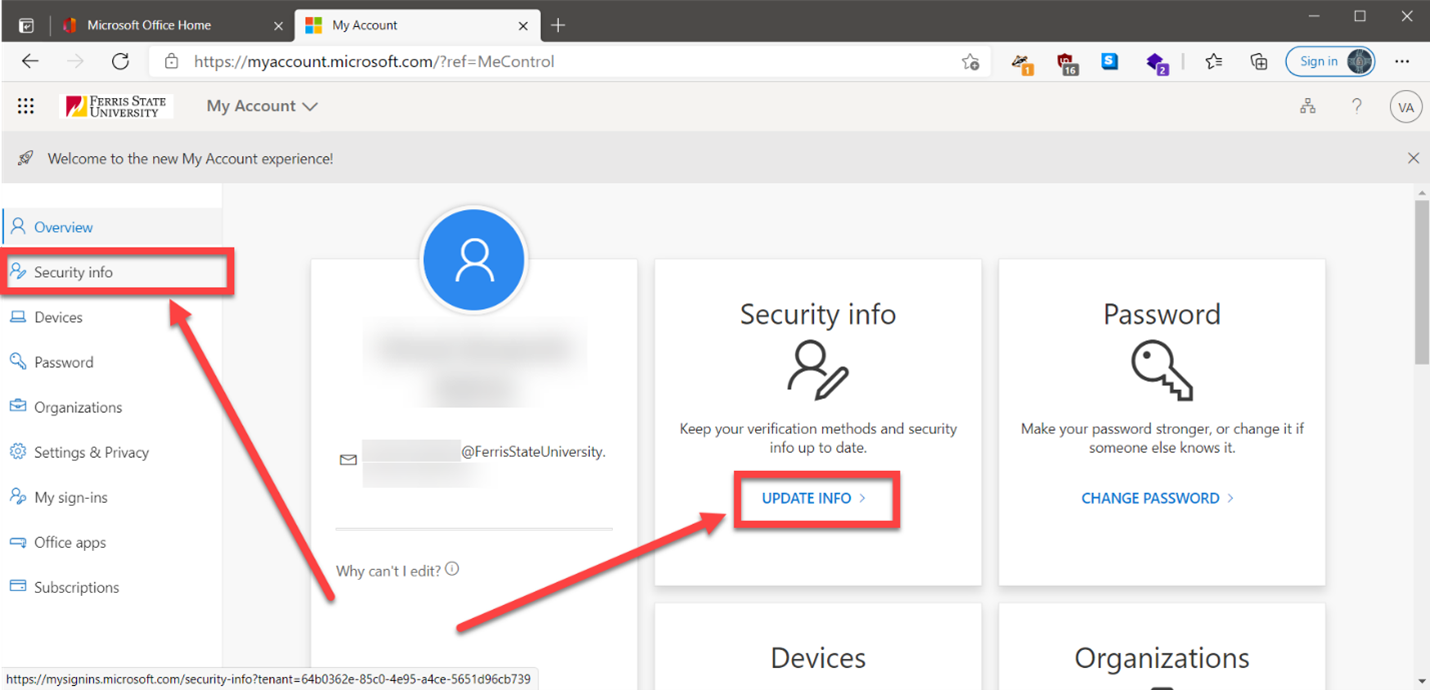
5. After clicking “View account”, a new tab will open click on the “Security info”
from the left-hand menu or click on the “UPDATE INFO >”

6. After clicking on either “Security info” or “UPDATE INFO>” the page will refresh to allow you to add new authentication methods

7. Next, click on the “Add method” and then select a method from the dropdown menu then click “ADD”


8. Follow the on-screen instructions to finish the addition of the new MFA method
It is a good practice to always keep your MFA options up to date, you can access all your MFA options by following the steps below
1. Navigate to office.ferris.edu in your browser and type your email address into the box. Hit Next and then enter your account password. Hit the “sign in” button.
2. Complete your MFA approval step. [ NOTE: This step may vary based on your default MFA option.]
3. Once logged into your account you will see a screen like the image below; click
your account name on the top right of your screen.

4. Once you have clicked on your account name you will see two different options
“View account”, and “My Office Profile” Click on the “View Account” tab.

5. After clicking “View account”, a new tab will open click on the “Security info”
from the left-hand menu or click on the “UPDATE INFO >”

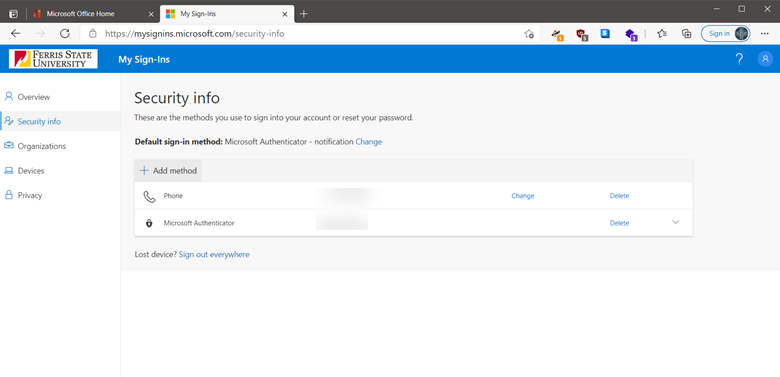
6. After clicking on either “Security info” or “UPDATE INFO>” the page will refresh to allow you to view all your MFA options. Here you can add/modify/delete MFA options or change the default sign-in method.

For authentication using TOTP or Physical OTP token, IT services/your department will provide you with a physical token that will be used for authentication after MFA is enabled on the account using Physical token. If a user is unable to perform their MFA method ITS will only reset the MFA methods on the user’s account. If that user is only configured with a Hardware Token such as an OTP token the customer will need to utilize the OTP token to log into Office 365. If that token is not in the possession of the user it is the responsibility of the user to retrieve it. If the hardware token is lost, stolen, or damaged the user will need to contact the ITSC to submit a service request.
If you are assigned a TOTP or Physical OTP token for authentication, then you will be asked to provide the 6 digit token displayed on the screen after you enter your credentials as described below.
1. Navigate to office.ferris.edu enter your email address in the username section and click next then enter the password and click Sign in.
2. Now the login screen will ask you to enter the TOTP key as displayed on the physical token after pressing the Power button.


Note: If for some reason you are unable to click verify click on the sign-in another way and select enter code from authenticator app and repeat the process to log in again.
If you would like to use a Yubikey for authentication please follow the instructions below. Note before you can add Yubikey we recommend adding an alternate method for MFA authentication as we noticed sometimes the Yubikey doesn’t work as expected in our environment.
1. Navigate to office.ferris.edu enter your email address in the username section and click next then enter the password and click Sign in.
2. Once logged into your account you will see a screen like the image below; click
your account name on the top right of your screen.
3. Once you have clicked on your account name you will see two different options
“View account”, and “My Office Profile” Click on the “View Account” tab.
4. After clicking “View account”, a new tab will open click on the “Security info”
from the left-hand menu or click on the “UPDATE INFO >” 
5. After clicking on either “Security info” or “UPDATE INFO>” the page will refresh to allow you to add/delete/change authentication methods

6. Click on Add Method and select Security Key from the dropdown options then click “Add”

7. Then follow the onscreen instructions by clicking on the Next button

Select the type of security key you are using. In this instance, we are using a USB device

After selecting the type of Key you will be prompted by a series of screens that will guide you through the setup process. Most of the security keys follow almost the same setup. When you click the Next button the screen will refresh and will prompt you to plug in the USB if it has not been plugged in already.

Click Ok to allow the security key to be set up with your account

Click Ok to finish the last setting for your security key

If this is your first time setting up the security Key it will ask you to set up a pin which can be any number. then click on ok button
Note: Please remember this number as it will be used for future setups or logins
Enter the desired name for your security key and click on the Next button

The next screen shows you that you have successfully set up using the Security key. Click Done to complete the process.

1. Navigate to Office.ferris.edu then click on Sign-in options as shown below

2. Plugin your security Key to the computer then select the option to sign in with a security key

3. Enter the pin you have used to set up the security key

4. Touch the security key to authenticate with your account

5. You have now successfully logged into your account using the security key


24/7 Phone Support
(231) 591-4822
Toll Free: (877) 779-4822
Walk-up Support
8 a.m. - 4:30 p.m.
UCB 108
IT Core Service Support
8 a.m. - 5 p.m.