Skip to Top NavigationSkip to ContentSkip to Footer
Ferris State University BulldogFerris State University Logo

Setting up MFA for Office 365 via Authenticator App

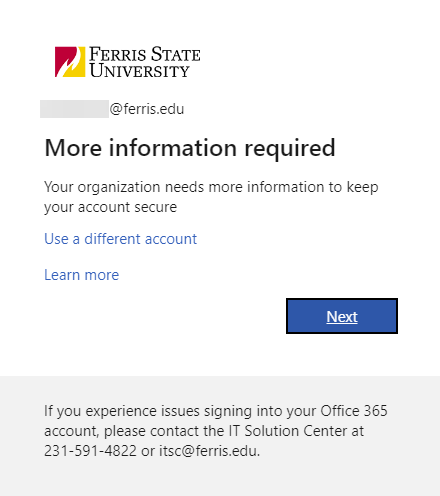
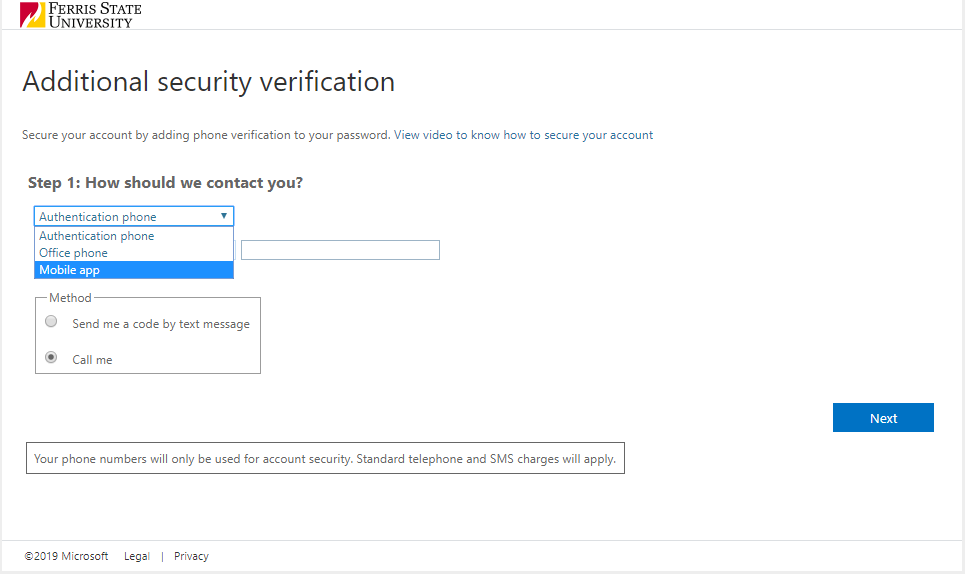
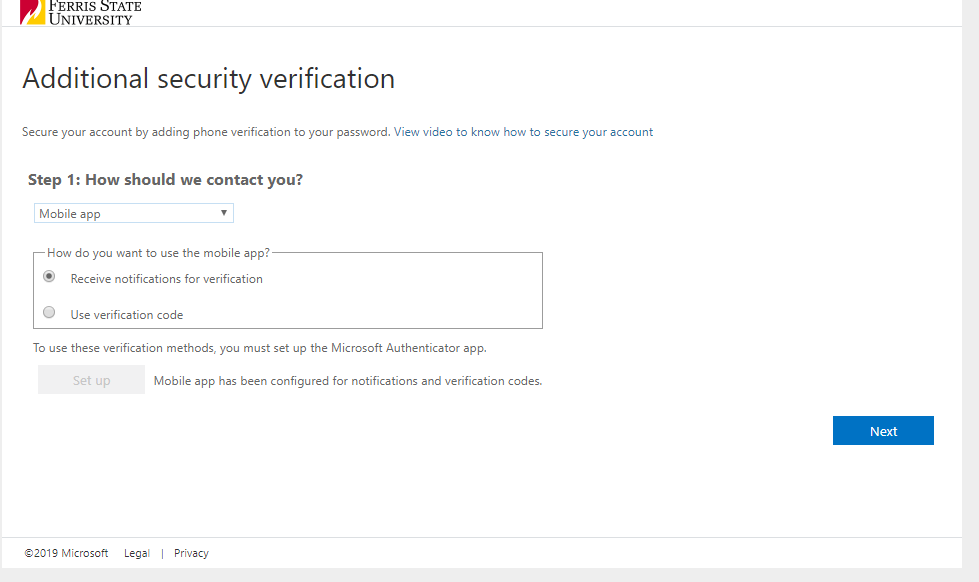
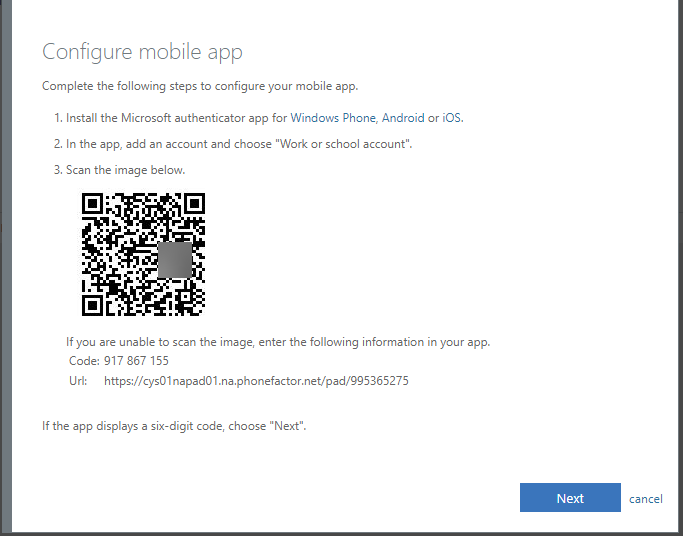
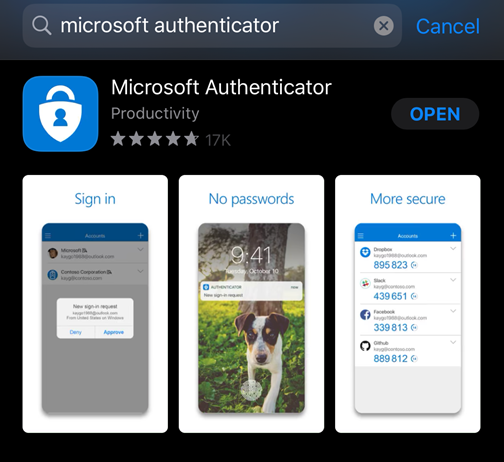
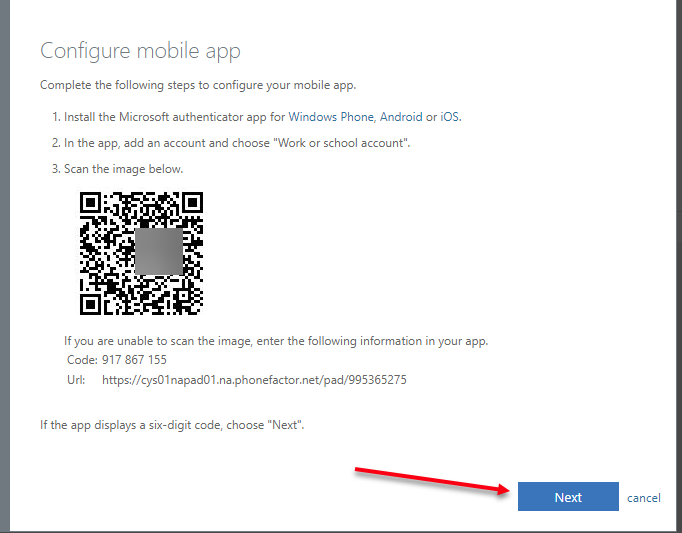
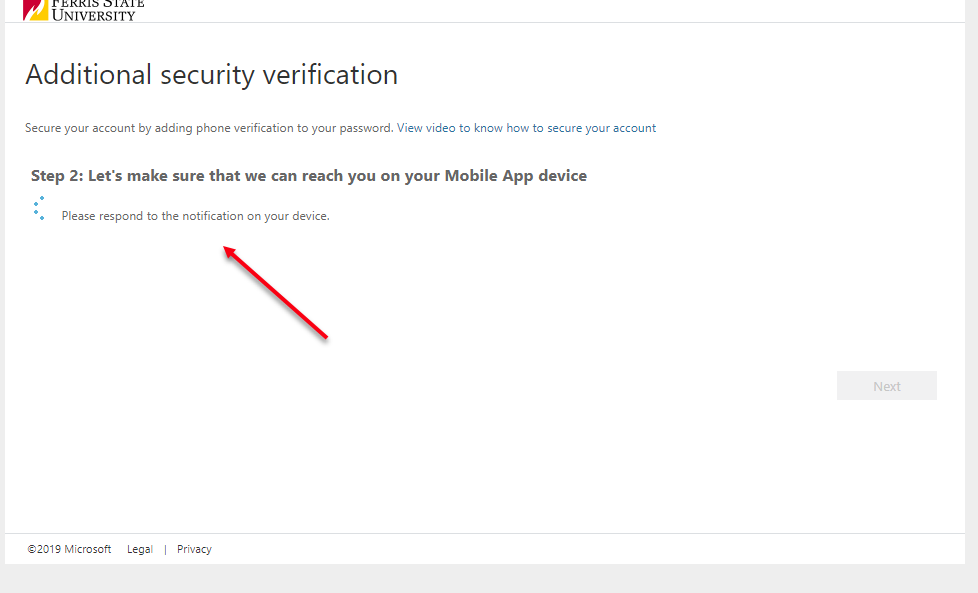
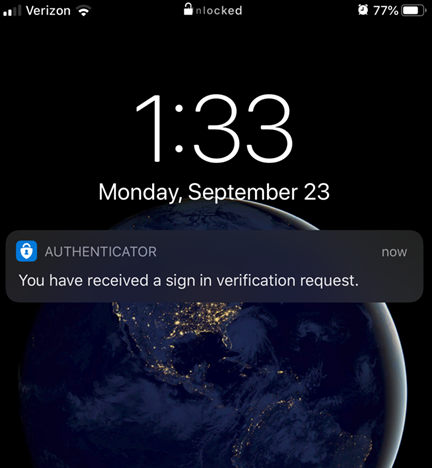
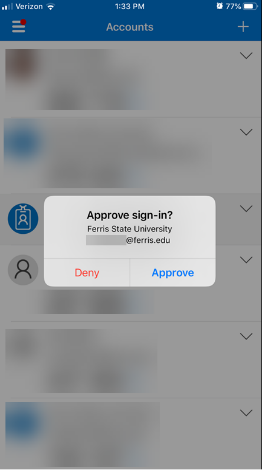
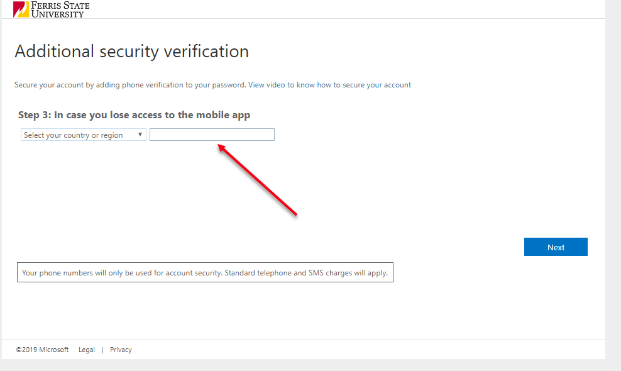
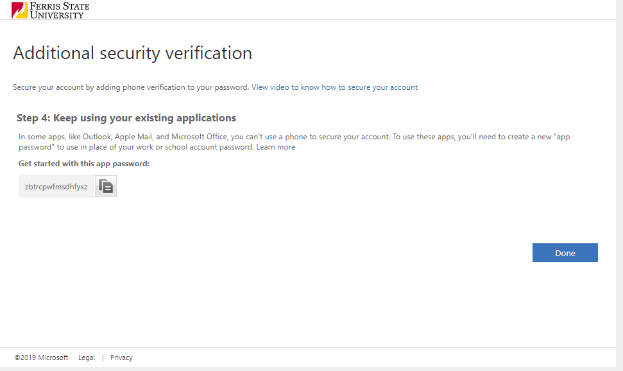
Multi Factor Authentication (MFA) is a security feature that requires more than one method of authentication to verify a user’s identity. MFA is important to setup since it will stop any hackers from logging into you accounts even if they obtain or guess your passwords.

Video: How to Set Up MFA

Step-by-Step Instructions

  1. Open a browser on your computer and go to office.ferris.edu. Sign in to your Office 365 for business account.
    mfa1

  2. You should see a window on your computer that looks like this. Click Next.
    mfa2

  3. From the drop-down menu, select Mobile App.
    mfa3
  4. Change the Radio button under Method to Receive notifications for verification.
    mfa4

  5. You now should see a window that looks like this.
    mfa5

  6. **On your phone** go to the App Store (iOS) or Play Store (Android) and search for & download Microsoft Authenticator.
    mfa6

  7. Open the authenticator app and click on the + button in top right-hand corner.
    mfa7

  8. Click on Work or school account.
    mfa8

  9. Your phone should prompt you to allow authenticator app to use your camera. Click Allow.
    mfa9

  10. Point the camera at the QR code on your screen. The app should auto detect and enroll your account.
    mfa10

  11. Go back to your screen and click Next.
    mfa11

  12. Wait for the checking activation status message.
    mfa12

  13. Once you see this page and the message “please respond to the notification on your device”. Check your phone for a new notification of the authenticator app.
    mfa13

  14. Click on the notification.
    mfa14

  15. Unlock your phone and click Approve.
    mfa15

  16. Enter your phone number.
    mfa16

  17. Click on Next. (This password is used for legacy applications that don’t support MFA, refer to our MFA support apps guide if that is required)
    mfa17