

24/7 Phone Support
(231) 591-4822
Toll Free: (877) 779-4822
Walk-up Support
8 a.m. - 4:30 p.m.
UCB 108
IT Core Service Support
8 a.m. - 5 p.m.


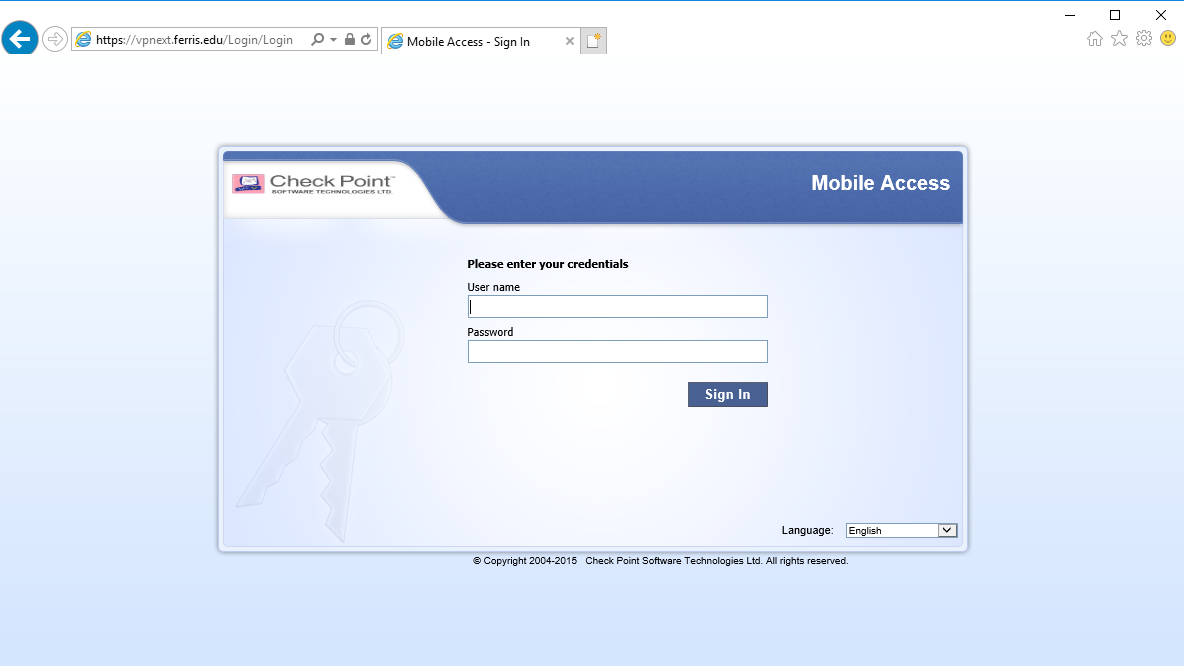
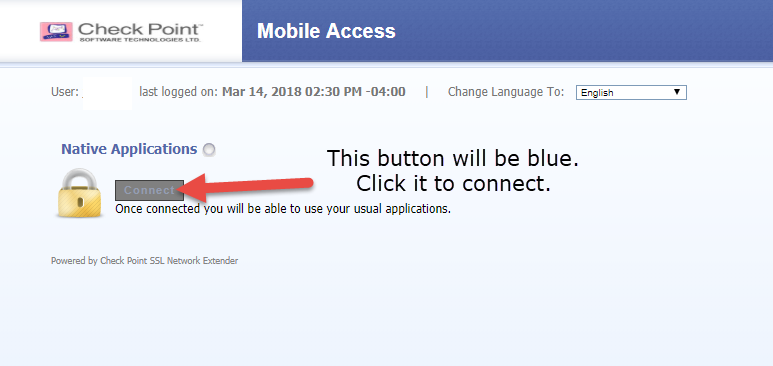
Go to vpnext.ferris.edu and allow the applet to install. Use your AD credentials.
Always run the latest version of Java (a Java prompt will appear). Use Internet Explorer. Chrome and Firefox do not support Java so only Internet Explorer will work.
Add vpnext.ferris.edu as a trusted site in the Java console and in Internet Explorer. If you don't know how to add a trusted site to Java, instructions are here.
Always allow pop-ups from https://vpnext.ferris.edu/Login/Login in Internet Explorer. If you don't know how to do this, instructions are here.
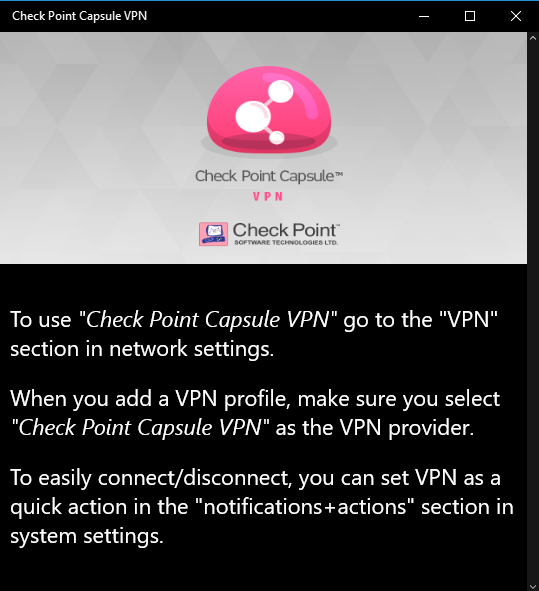
Download and install the Check Point Capsule VPN app in the Microsoft Store. You can log in with your Microsoft account to download if you so choose
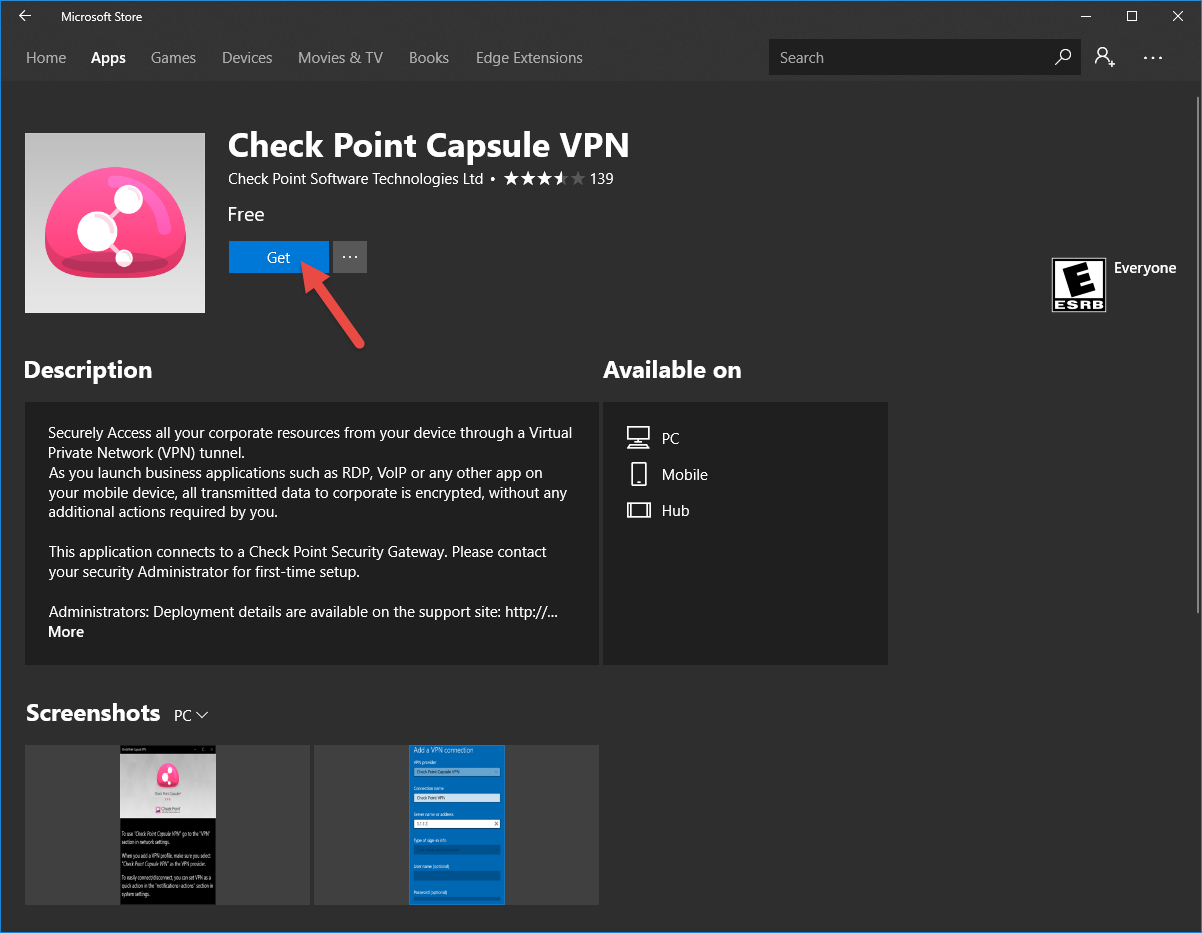
Once downloaded, click Launch. The following screen will pop up. Follow the instructions to connect to the VPN.
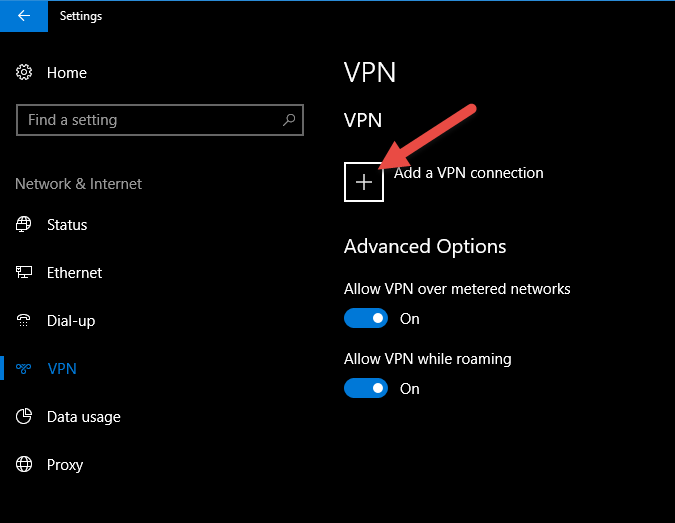
Click on the Windows button in the lower left of the screen and select Settings. From the Settings window, click on the Network & Internet icon. Next click on the VPN button on the left side of the window.
Note: If you have removed the Ferris VPN connection and are reconnecting to the VPN,
use a different connection name. For example, VPNFerris instead of FerrisVPN. 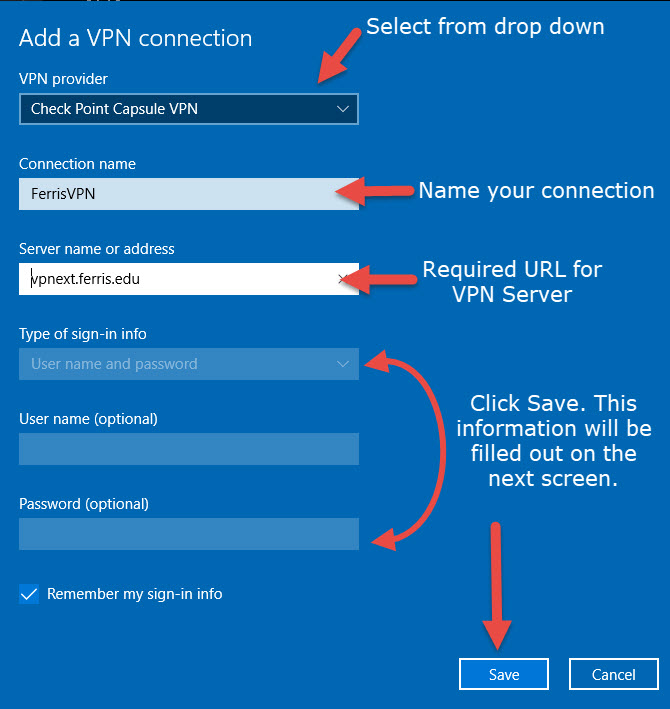
To connect to the VPN, select the VPN you would like to connect to and then select
Connect.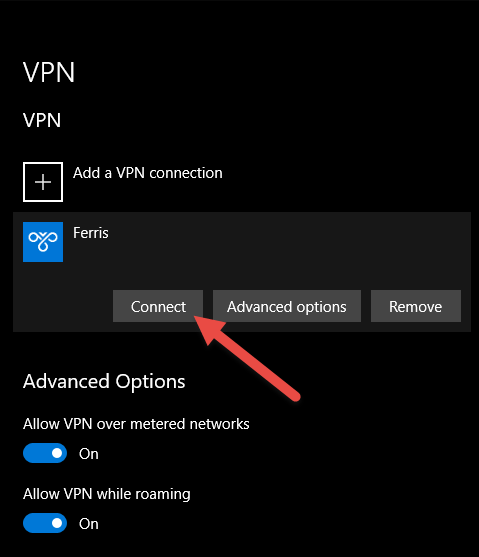
Select the VPN Multi-Factor Authentication method for the Network sign-in info.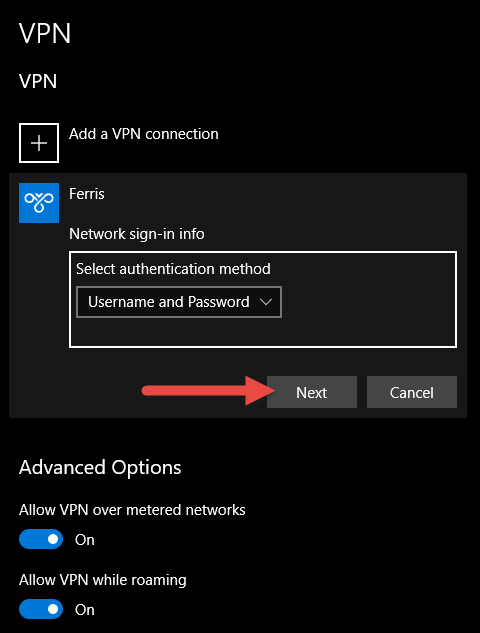
Sign in using your ID and password, then select OK. Follow the prompts to complete
Multi-factor Authentication. 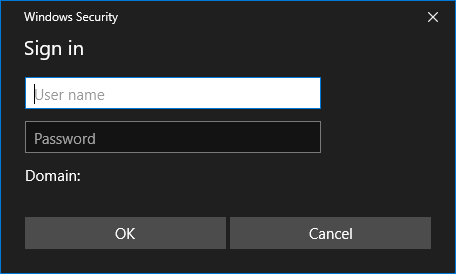
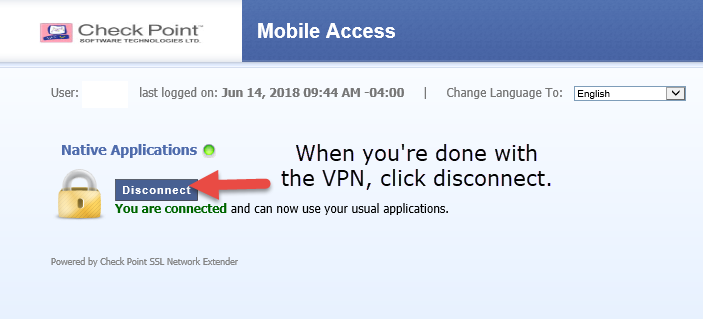
When you are finished using the VPN, return to the VPN settings window and select
Disconnect.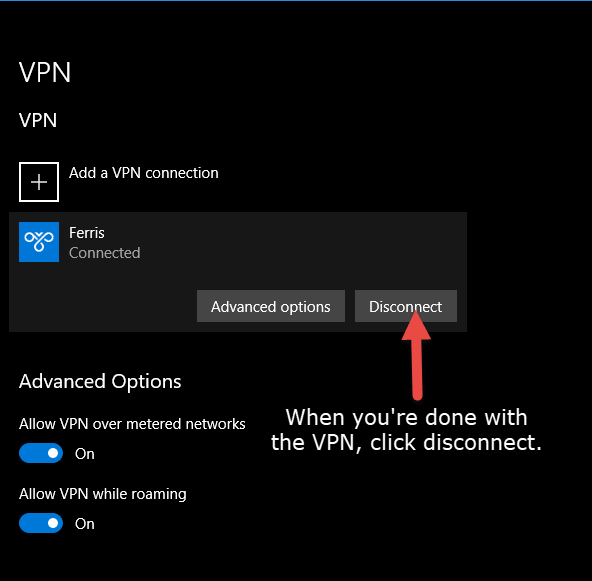
NOTE – If the VPN connection does not connect, you may need to clear the Sign-In info. To do this, click on the VPN connection you created above and click the Advanced options button. On the new window that opened, click the Clear sign-in info button to clear the username and password. Next time you connect to the VPN it will prompt for these again.
Windows and Android – use Capsule VPN not Capsule Connect.
Instructions for installing the VPN client for Windows 11 are available on the new IT Services Portal.
Installing & Configuring the VPN on Windows 11 PC
Note: Log in to your Ferris Office 365 account and try the link again if the link doesn't work the first time.
1. Click here to access the required client files to install the CheckPoint VPN on your Mac. You
will need to copy these files to your desktop.
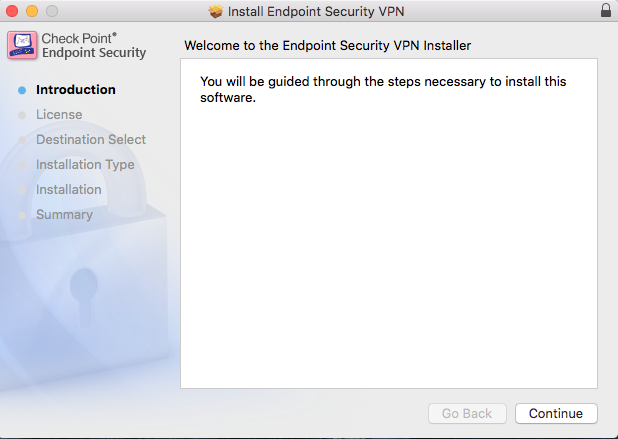
2. Open the latest version of the application, "Endpoint_Security_VPN.dmg" and launch
"Endpoint_Security_VPN.pkg".
3. Click Continue and follow the steps to install software.
4. Once 80.89.dmg is installed, open "Endpoint_Security_VPN_80.89_HotFix.dmg" and
launch "Endpoint_Security_VPN.pkg". It should detect that a version of CheckPoint
is installed and upgrade it to the latest available build.
Note: The hotfix fixes random disconnection issues with the base application.
5. Click OK and Continue, and follow the steps to install software. 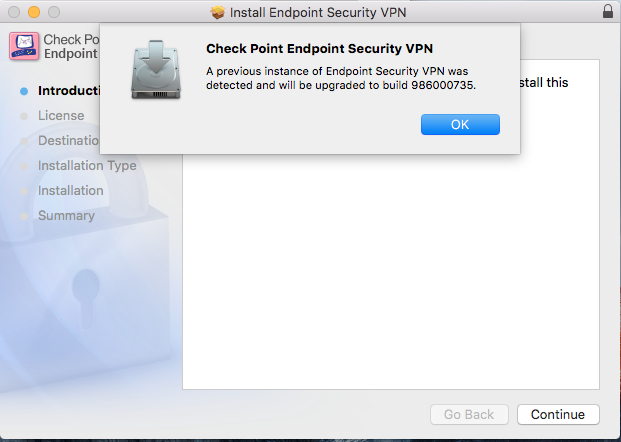
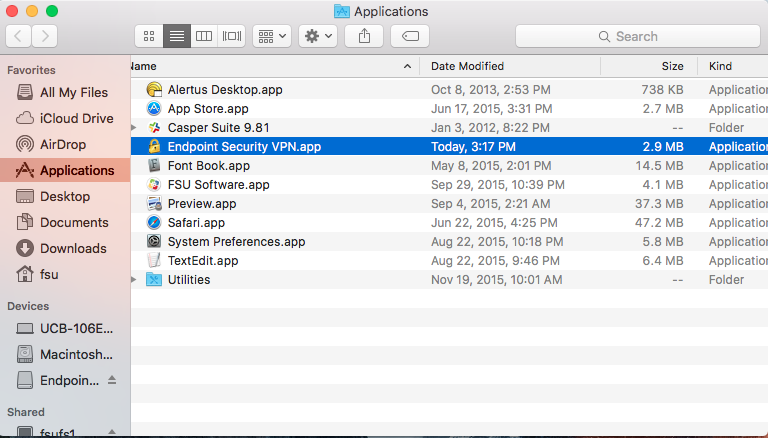
6. Close the installers, open the Applications folder, and launch "Endpoint Security
VPN.app". A lock icon should appear in the top-right hand side of your screen.
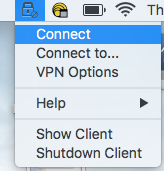
7. Click it and then click "Connect".
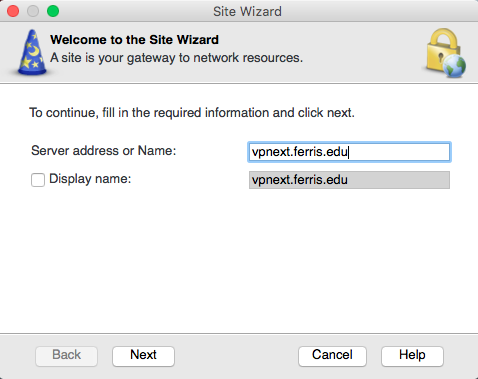
8. Click "Yes" to configure a new site and click "Next" on the Site Wizard welcome
screen.
9. Enter "vpnext.ferris.edu" in the Server address or name box. The display name is
the same as the server address by default, but you may change it if you desire.
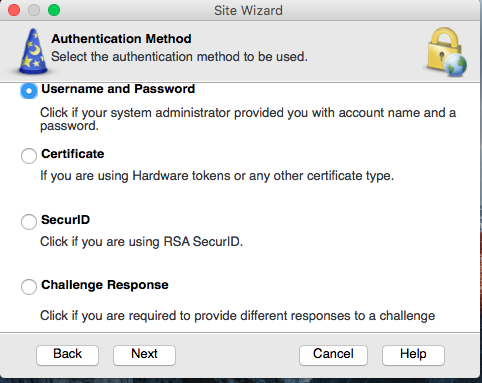
10. Keep "Username and Password" as the Authentication Method.
11. Click "Finish" to exit the wizard.
12. When connecting to the VPN, verify that the site is "vpnext.ferris.edu" (or whatever
you chose to name it), and enter your Ferris credentials to connect.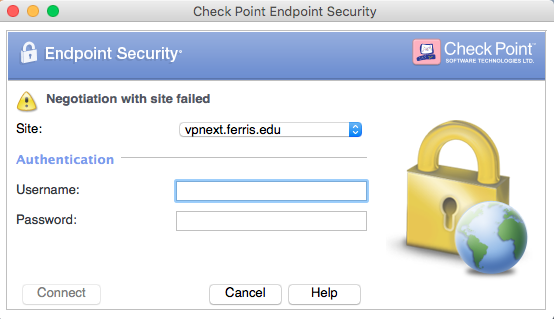
24/7 Phone Support
(231) 591-4822
Toll Free: (877) 779-4822
Walk-up Support
8 a.m. - 4:30 p.m.
UCB 108
IT Core Service Support
8 a.m. - 5 p.m.