Adding content to your sign always begins the same way. However, there are certain elements of different types of content that are different.
Adding the Different Types of Content
- Right click on the folder you want your image to be imported into and select 'New Content in this Category', then select 'Image'.
- In the dialog box, select the ellipses next to the URL region to browse your computer
for your image file. ONLY .jpg, .jpeg, .png, or other image file formats will be viewed
through this selection. Selecting your file before naming it will also give the file
the same name as it is in your computer's file management system.
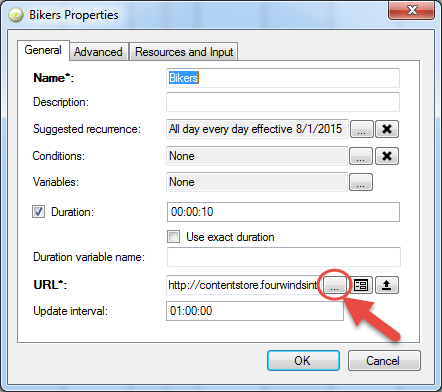
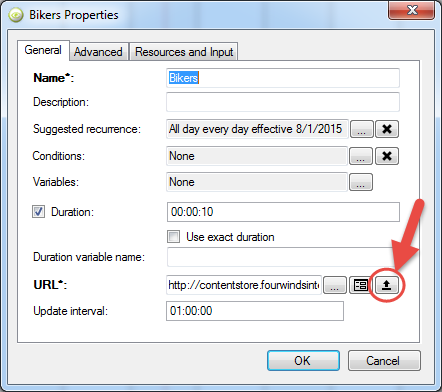
- Click on the 'upload arrow' in the URL region. Only do this if your file is not coming
from the M-Drive. If your file is coming from the M-Drive, continue to step 5.
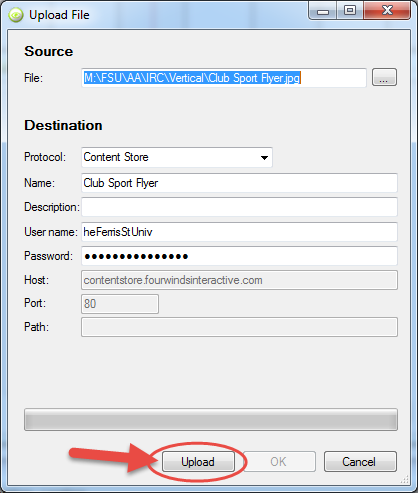
- In the next dialog box, click upload. Once the image is done uploading click 'OK'
to return to the previous dialog box.
- Change the duration to between 8 and 12 seconds. Use your best judgment.

- Under 'Suggested Recurrence', click on the ellipses to schedule your content.

If you are scheduling a poster for an event, select 'End by:' and select the day after the event takes place and select 'OK'.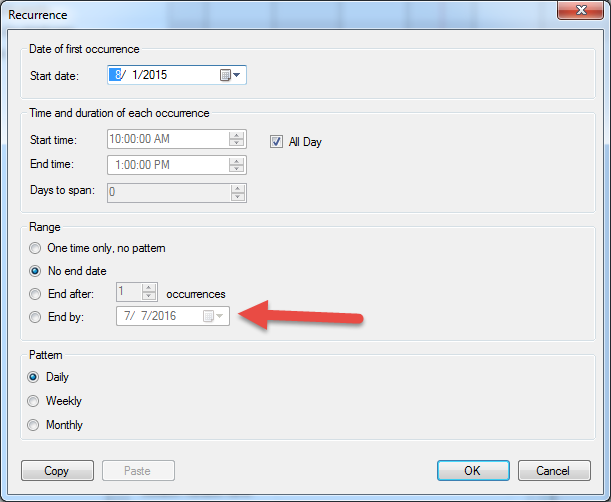
- Change the Scaling option to 'Fill container, distort aspect ratio if necessary'.
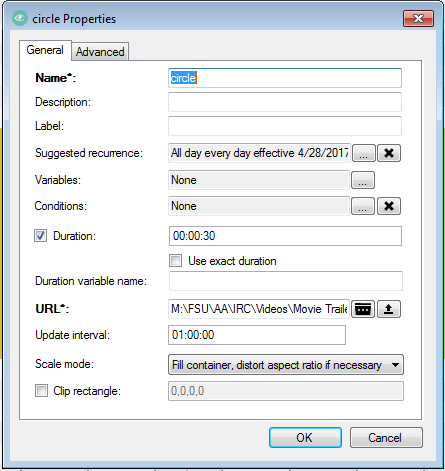
- Go back to the 'General' tab and click 'OK' to complete uploading your image.
- Right click on the folder you want your image to be imported into and select 'New Content in this Category', then select 'Video'.
- In the dialog box, select the ellipses next to the URL region to browse your computer
for your video file.
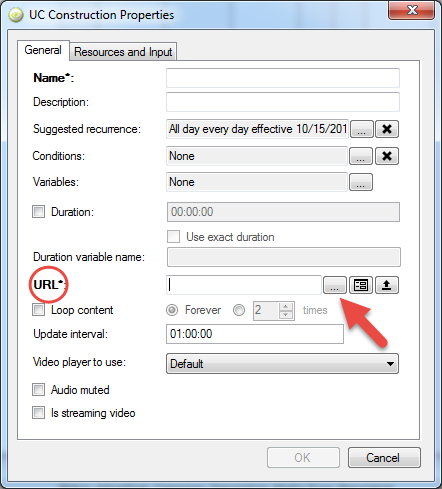
- Click on the 'upload arrow' in the URL region. Only do this for files that are not located on the M-Drive. Videos that are pulled from the M-Drive work much better than videos that have been uploaded to Content Manager.
- In the next dialog box, click upload. Once the video is done uploading click 'OK'.
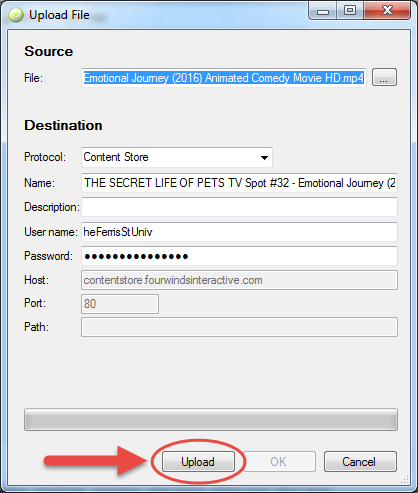
- The video will play for the entire duration, so duration does not need to be set if the entire video should play.
- Click 'OK' to complete uploading your video.
- Right click on the folder you want your PDF to be imported into and select 'New Content in this Category', then select 'Adobe PDF'.
- In the dialog box, select the ellipses next to the URL region to browse your computer
for your PDF file.

- Click on the 'upload arrow' in the URL region.
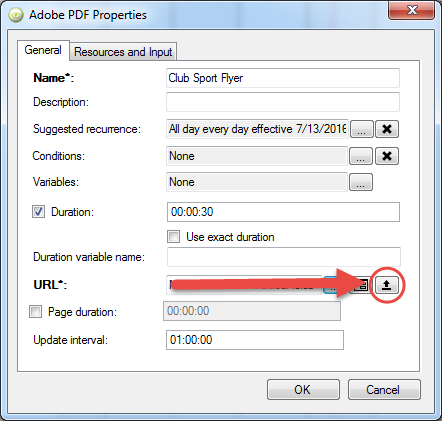
- In the next dialog box, click upload. Once the PDF is done uploading click 'OK' to return to the previous dialog box.
- Change the duration to between 8 and 12 seconds. Use your best judgment.

- Under Suggested Recurrence, click on the ellipses to schedule your content. If you
are scheduling a poster for an event, select 'End by:' and select the day after the
event takes place.

- Click 'OK' to complete uploading your PDF.
*The only differences from adding an image is that PDFs have the option to set 'Page Durations'. Images also have an 'Advanced' tab where you can make the image scale to fit the region. PDF's are not scalable. Keep this in mind when adding your content.
- Right click on the folder you want your RSS feed to be imported into and select 'New Content in this Category', then select 'Syndicated Feed'.
- Copy and paste your RSS feed's URL into the URL box.

- Make sure the 'Scroll Text' box is checked.
- Select 'OK' to complete adding your RSS feed.
- Right click on the folder you want your PowerPoint to be imported into and select 'New Content in this Category', then select 'PowerPoint'.
- In the dialog box, select the ellipses next to the URL region to browse your computer
for your PowerPoint file.
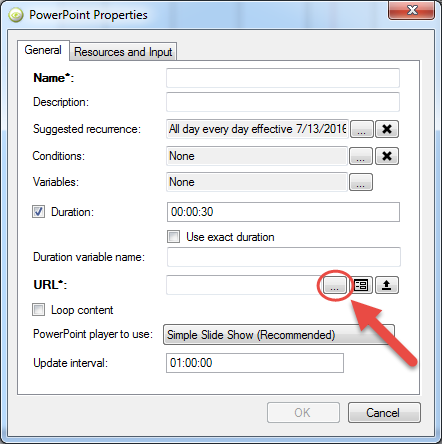
- Click on the 'upload arrow' in the URL region.
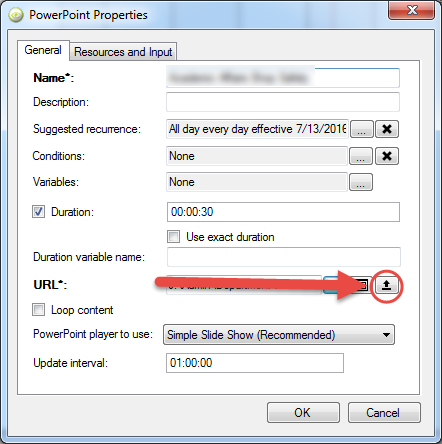
- In the next dialog box, click upload. Once the PowerPoint is done uploading click 'OK' to return to the previous dialog box.
- Click 'OK' to complete uploading your PowerPoint.
- Right click on the folder you want your file to be added to and select 'New Content in this Category', then select 'Date/Time'.
- Click on the ellipses next to the Layout field.
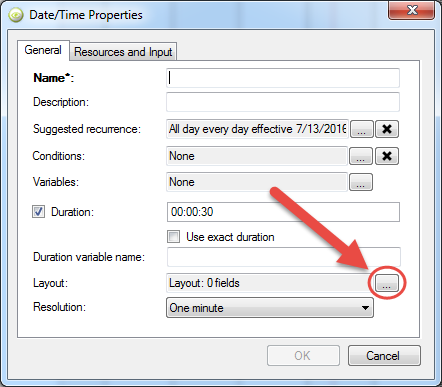
- Drag the 'Date/Time' field into the layout area from the Data field area of the dialog
box. (Tip: Drag two boxes into the layout region; one can display the date while the
other displays the time.)
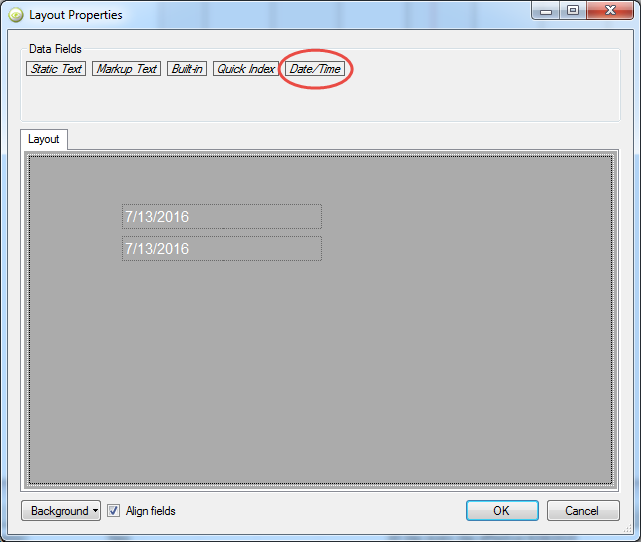
- Right click anywhere in the fields or on the black arrow to bring up a pull down menu.
- Go to the 'Formatting' option and select the format in which you wish your date or time to be displayed.
- Click 'OK' on both dialog boxes to create your Date/Time widget.
- Right click on the folder you want your file to be added to and select 'New Content in this Category', then select 'Weather'.
- Give the content a name and then go all the way to the bottom of the dialog box where
it says 'Zip Code' and type in the zip of the location you want to be displayed.
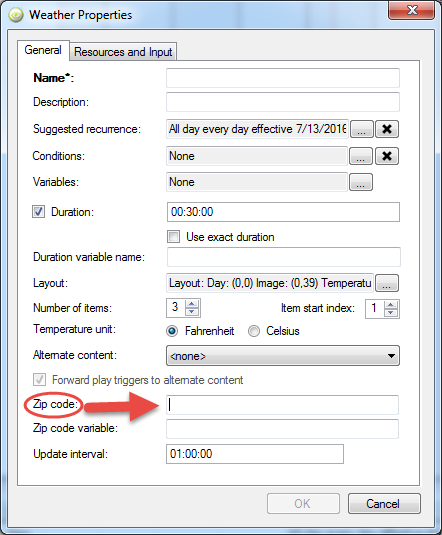
- Next, go to the layout and click on the ellipses.
- You will most likely want your layout to be something like this:
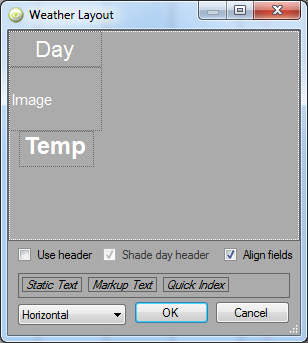
- Select 'OK' to save your changes in the layout dialog box.
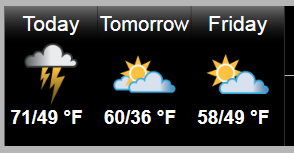
*You may have to fiddle with the layout a little bit so that the images or words don't overlap. You should end up with something like this.


